This tutorial will replicate a magic marker tip using the brush tool. The overall effect is very close to an actual magic marker with the exception of not having any fun chemicals to smell 🙂
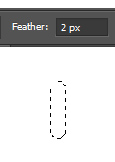
1. Select the rectangular marquee tool and set the Feather Radius to 2px
Draw tall skinny rectangle.
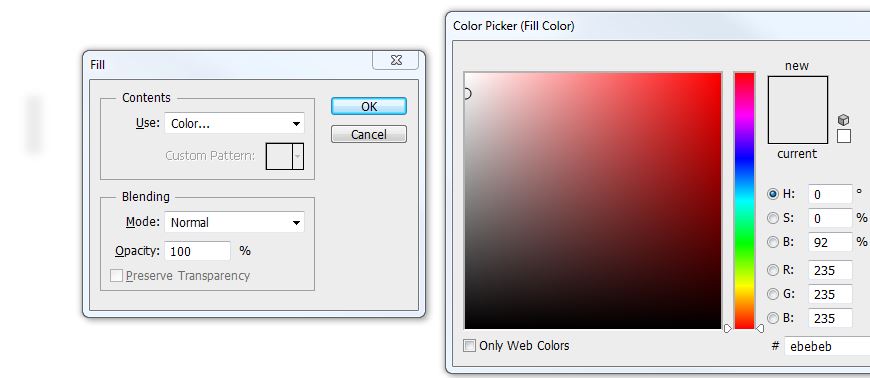
2. Go to the EDIT menu > FILL and fill using Color #ebebeb (a very light gray)
3. Change the Feather Radius back to 0px (zero) and make a rectangular selection around the fuzzy rectangle.
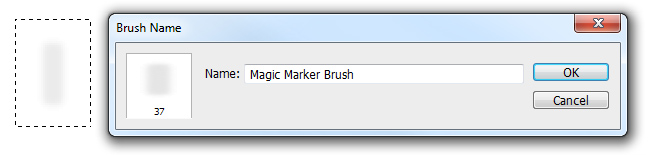
4. Go to the EDIT menu > DEFINE BRUSH PRESET and name the brush Magic Marker Brush.
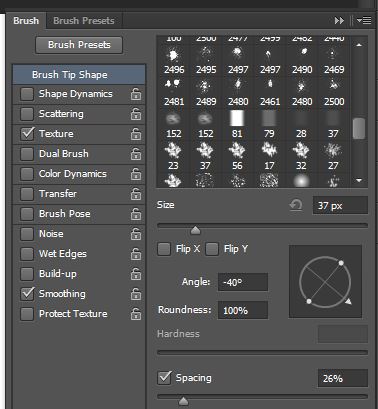
5. Select the Brush tool on the toolbar (you won’t be able to edit the brush unless that is the currently selected tool.) Click on brush panel icon.
![]()
if you can’t find it go to the WINDOW menu > BRUSH.
6. Find your saved magic marker brush – the name will pop up when you hover over it. Click on Brush Tip Shape and modify the angle to anywhere between 30 and 45 degrees.
7. To add a slightly varied texture for the brush (to emulate the grain of paper for instance) click on Texture. Click on the texture drop down and then the gear icon to show more textures to choose from – select the grayscale paper texture and append (add) to your list.

8. Select the Linen texture (I selected this one because it has a very subtle texture – choose other ones if you desire more texture)

9. Set the brightness and contrast. For a darker stroke set the brightness to a positive number, for lighter set it to a negative. For this brush we will keep it on the lighter side – anywhere between -20 and +20 is fine. To express more texture – set the contrast setting higher – this will make the texture itself more contrasty (meaning there will be more extreme blacks and whites in the texture) For this brush I am going to keep it on the lower side so the variations are more subtle – somewhere between – 10 and – 40. Set the mode to Multiply (the default)
10. Save your brush. Click on the context menu and click new brush preset, you can rename it or have Photoshop name it magic marker brush 1.

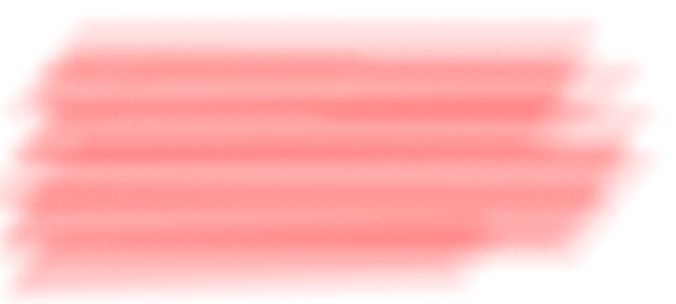
11. Try out the brush – select a color and change the opacity to 50% and draw some strokes on the screen. Set the opacity lower if you desire even less contrast.
12. Some brush too tips:
• Click a point on the screen then hold down the shift key and then click somewhere else, photoshop will draw a straight line.
• Use the left and right square bracket keys to change the size of the brush – left bracket for smaller, right bracket for larger.
• The saved brush preset can also be used with the eraser tool.