![]()
This tutorial shows you how to draw a simple gear shape using transformations and the pathfinder panel in Illustrator. 1. Turn on the VIEW menu > GRID and VIEW menu > SNAP TO GRID and set the default colors (type D on the keyboard.) Draw a perfect 2” circle (hold SHIFT) from the corner of a large grid square.

2. At the top of the circle, draw a 1/2″ square (4 small grid squares by 4 small grid squares) at the top of the circle.

3. Select the square with the selection tool (black arrow) and use the left arrow key to move the square over two small grid squares (2 clicks) and then use down arrow to move it down one square (1 click)

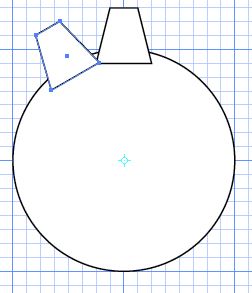
4. Deselect the square. Reshape the square by dragging in each corner toward the center with the direct selection tool (white arrow), one grid square each direction.

5. Rotate and copy the gear tooth. With the square still selected, click the rotate tool on the toolbar and hold down the alt/option key to drag the reference point to the center of the circle. Release the alt/option key and mouse button and type in 30 degrees and click COPY. Go to OBJECT menu > TRANSFORM > TRANSFORM AGAIN (command + D) to repeat the rotation until there are gear teeth around the entire circle.


6. Select all the objects on the screen (1 circle and 8 squares) and click the UNITE icon on the pathfinder panel.

7. Draw a small circle from the center (hold down the alt/option key) starting at the center of the gear shape. Select the new circle and the gear shape and click on the MINUS FRONT icon in the pathfinder panel.

Photoshop, Illustrator and InDesign Tutorials

One response to “Drawing a Gear in Illustrator”