

Vectorizing your sketches or graphics you’ve found on-line is extremely beneficial to propelling your design ideas forward. Below are some general notes about how to prepare images in Photoshop and how to use the Image Trace tool in Illustrator.
• If using an original drawing trace over your pencil sketch with the densest medium you can use to achieve a clean dark line – pencil works if it’s dark enough – but typically a black sharpie or other black ink pen is best.

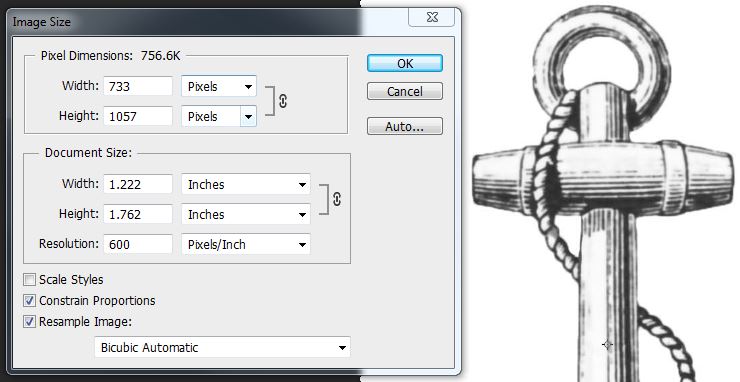
• Set up your scanner to these approximate settings: either 600 pixels per inch (P.P.I.) OR if that is unavailable 300 pixels per inch but 200% of the original size. Set the image type to grayscale. If you have a choice of a file format to scan to, choose TIF if its available, otherwise JPG will suffice.


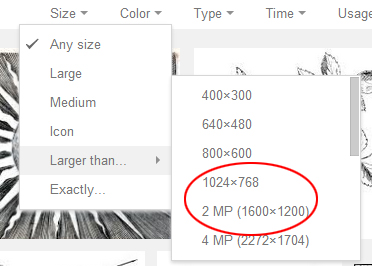
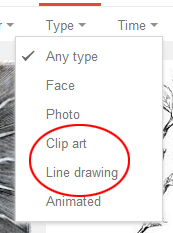
• If using a sourced graphic from the Internet, use the search tools in Google Images to find larger images, you can also use this tool to find only black and white images as well. The better quality the image is to start with, the better chance you have to make clean vector image.

• Open the image in Photoshop and view the image at full size (cmd/ctrl + 1) if the image looks very pixelated the resulting vectors will be low quality as well.
Every image will need some tuning up in Photoshop prior to being vectorized in Illustrator.
• A scanned drawing – as well as many downloaded images – will always need some contrast adjustment. Go to the IMAGE menu > LEVELS to make the image high contrast black and white and eliminate the gray cast from paper. Drag the white and black sliders towards the center to achieve this.

move black and white sliders towards the center of the scale to achieve the correct contrast. Adjust the gamma (gray) slider to further emphasize darks or lights
• OPTIONAL Some images will need to be enhanced to improve the quality of the linework. This is achieved by using FILTERS > BLUR > GAUSSIAN BLUR with a setting of between 1.0 and 2.0 and then using LEVELS to adjust the contrast. This can sometimes eliminate rough edges and noise in the sourced image. Further editing with the eraser is a good idea to do at this point.
• Use FILE menu > SAVE AS and give the adjusted image a new name. This way you can always go back to the original if needed.

before (left) | after levels adjustment (right)
• In Illustrator make a new file and go to the FILE menu > PLACE and place in the adjusted image.
• When the image comes in it will be surrounded with a blue frame with a blue X. This indicates that you can do limited transformations to the image (scale, rotate, skew, reflect and move)
• With the image window selected the options menu at the top of the screen will reflect Image Trace options including embed, edit the original, image trace and mask.
• Use the black and white logo setting next to the image trace button to make the initial vector version. Illustrator looks at the file and creates vector shapes from everything visible in the image including the white of the paper (this will be eliminated in future steps)

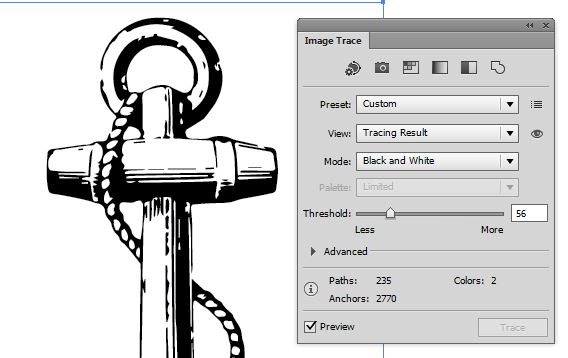
• At this point the vectorized image is still in Image Trace mode which means the resulting image can still be experimented with. Click the Image Trace Panel icon (or WINDOW menu > IMAGE TRACE) to adjust the settings. The Threshold setting will make the resulting image darker if moved to the right or light if moved to the right. Click the Advanced tab to view other setting including Paths (a higher value makes a tighter fit to the original), Corners (a higher value produces more corners/jagged edges) and Noise (a higher value will eliminate more noise). Experiment with all of these settings to get the desired result. It may take some processing time between adjustments so be patient!
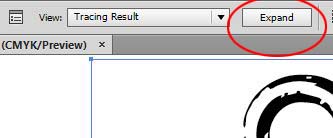
• After the desired result is achieved, expand the Image Trace into the actual vectors by clicking the EXPAND button.
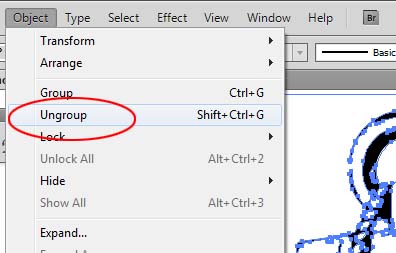
• Everything will be grouped at this point, go to the OBJECT menu > UNGROUP.
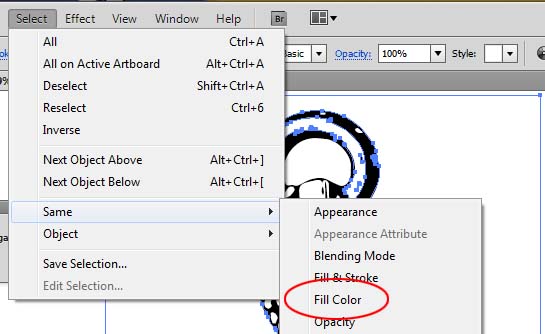
• Select and area of the white background, then go to the SELECT menu > SAME > FILL COLOR to select all areas of white. Delete all of those areas by hitting the DELETE key on the keyboard.
• The vectorized image can now be recolored or areas can be edited as needed
