

As much as photographers strive to make great images with tremendous clarity, amazing tonal range and rich vibrant colors there’s a sometimes curious preference among the public for photos that are exactly the opposite. Faded photos present a notion of recent history, a yearning for another time and nostalgia for events that may or may not have happened in the way they have been portrayed. Regardless of where you fall within this spectrum, having an understanding of why old photos look the way they do and how we can use Photoshop to mimic it are invaluable tools.
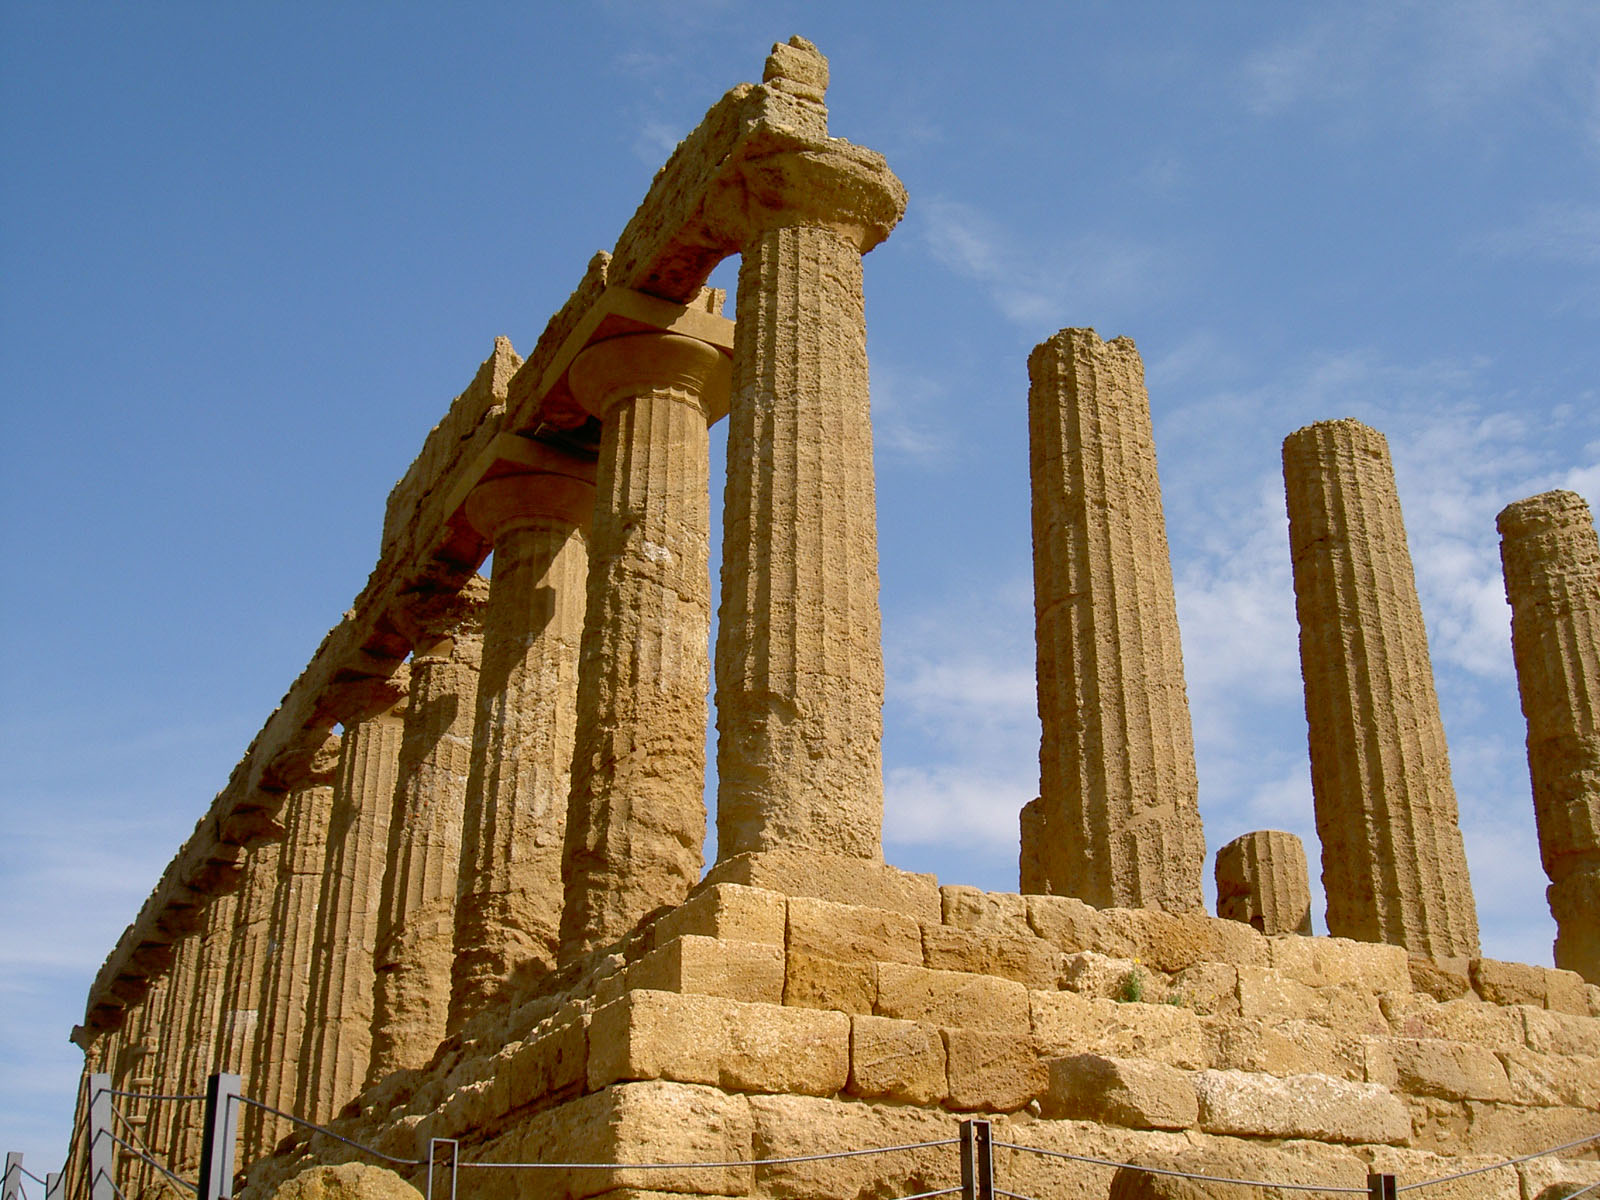
Essentially, with this effect, we are going to shift colors, desaturate portions of the image and de-contrast the image – everything a good photograph is NOT supposed to be. You can use any image for this tutorial , if you don’t have one you can use this one.
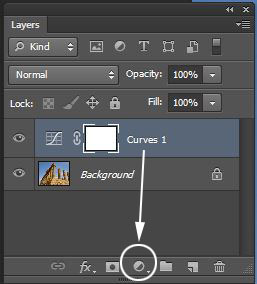
1. Open the image and make a new curve adjustment layer.
2. Older photographs typically degrade because of the instability of the chemicals and dyes used to make the image. Of the three colors used to make the image – cyan, magenta and yellow – cyan is the most unstable and red tends to be more stable. This is why most older images tend to have reddish cast and have less blue. In curves we’ll adjust individual R,G and B channels. We’ll boost the reds by dragging the curve up, add contrast to the green channel to lose detail and de-contrast the blue channel.
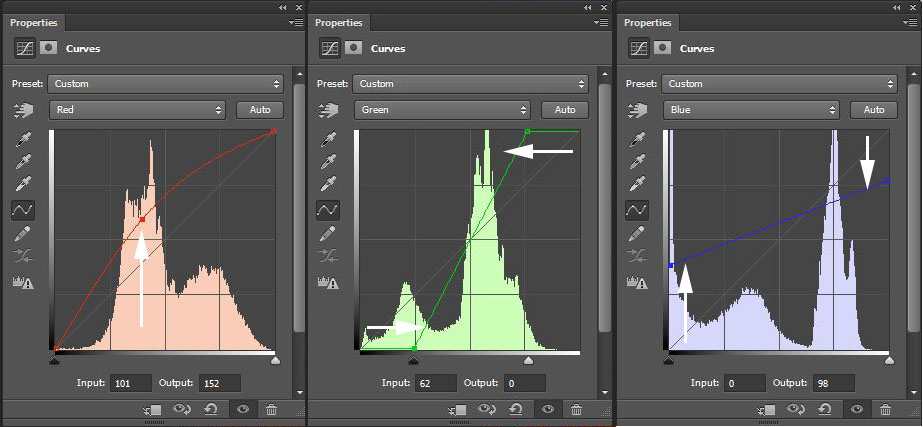
In the red channel, place a point on the curve where the highest concentration of values are and drag the point up – this will remap a good deal of the channels information to lighter values thus making the channel more red. In the green channel we won’t bend the curve, instead we’ll clip the color information by dragging the points at the bottom left towards the right and upper right towards the left – this will increase contrast. In the blue channel we’ll do something similar but we will decrease contrast instead. Take the lower left point and drag it up along the side and the upper right point down along the side. There is no absolutes with this effect, use settings that look best to your eye. By using adjustment layers you can continually adjust and tweak your settings.
the image so far
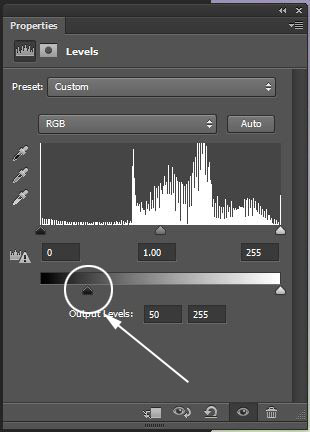
3. Next we’ll fade the image. Make a new levels adjustment layer and in the lower portion of the window drag the black point of the output level toward the center. This will get rid of any information darker than where the point is placed.
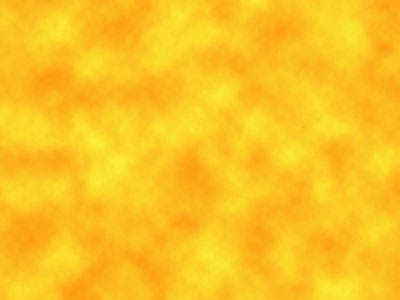
4. Add some variety to the aging. At this stage we have certainly achieved our desired result of shifting colors, losing detail and de-contrasting the image, but it feels a little to mechanical and uniform. To add some variety we’ll make some intensely colored clouds and mix it back into the image. Make a new layer and change the foreground color to a bright orange (#fc940d) and the background to a bright yellow (#faf336) go to the FILTER menu > RENDER > CLOUDS. (You can use any combination of lighter and darker high key colors, I’ve chosen these because the desired result is an overall warming of the image)
5. Change the layer blending mode to Soft Light. The Soft Light mode Darkens or Lightens the base colors, depending on the blend color. When a color is darkened, Photoshop looks at the value in each channel (R,G,B) of the base and blend color and uses the darker value (closest to zero), Lightening does the same thing except it uses the brighter value. 50% gray has no effect. Painting with pure black or white produces a distinctly darker or lighter area but does not result in pure black or white. In our image soft light will have the effect of subtly lightening and darkening the image while providing some overall warmth. Change the opacity to 30% to reduce the overall effect.
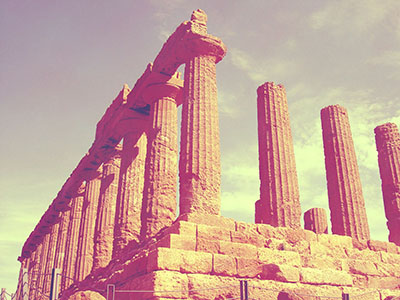
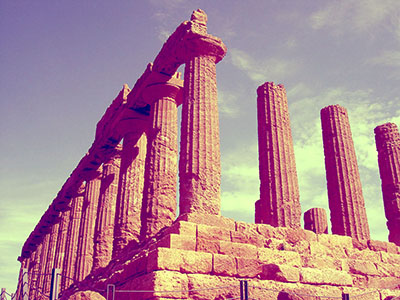
the resulting image