These instructions are intended for scanning black line drawings.
1. Trace over your pencil scheme with the densest medium you can use to achieve a clean dark line – pencil works if it’s dark enough – but typically a black sharpie or other black ink pen is best.
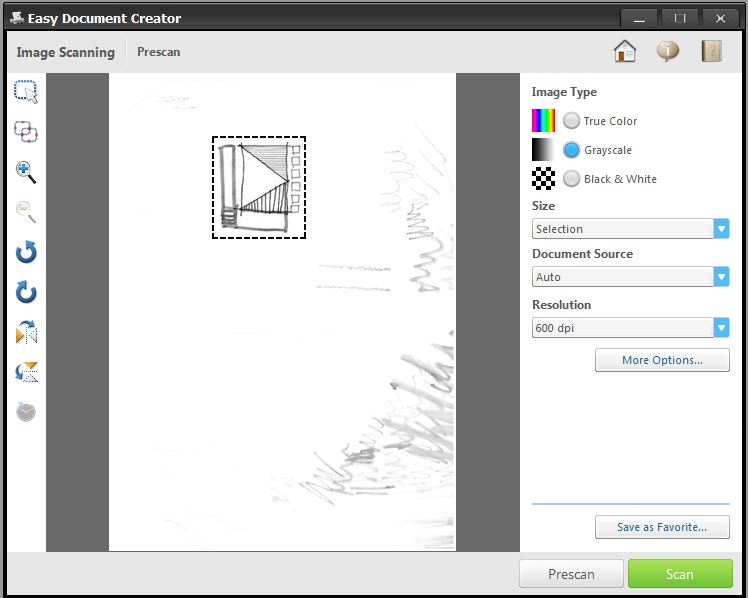
2. Set up your scanner to these approximate settings: either 600 pixels per inch (P.P.I.) OR if that is unavailable 300 pixels per inch but 200% of the original size. Set the image type to grayscale. If you have a choice of a file format to scan to, choose TIF if its available, otherwise JPG will suffice.
3. Open the file in Photoshop
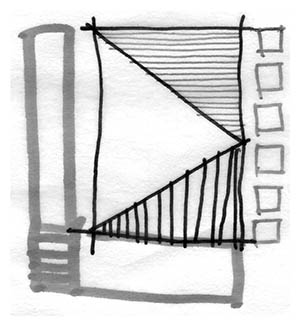
the original scan
4. Rotate the image as necessary using the IMAGE menu > IMAGE ROTATION > 90° CW or 90° CCW
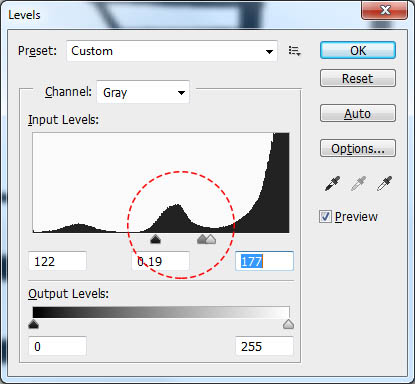
5. Go to the IMAGE menu > LEVELS to make the image high contrast black and white and eliminate the gray cast from tracing paper. Typically, the image information that wants to be enhanced is located towards the center of the luminosity scale, information on the left (black) and right (white) will be eliminated.
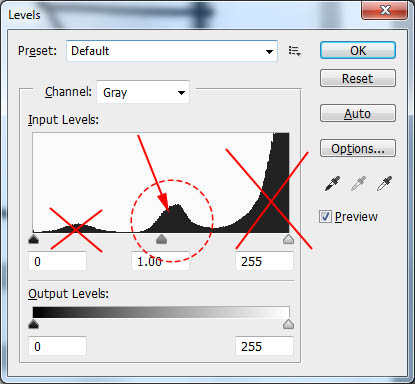
6. In this particular adjustment, black and white were clipped right to the beginning and end of the “mountain” in the middle and the gray point (gamma) was moved all the way over towards white to eliminate even more of the gray cast.
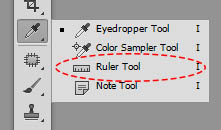
7. If you scan is not straight (99 times out of 100) open up the ruler tool, associated with the eye dropper to draw a reference line aligned to something that wants to be straight. Photoshop will use that as an arbitrary rotation angle.

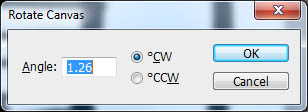
8. After drawing the line go to the IMAGE menu > IMAGE ROTATION > ARBITRARY… Photoshop will have automatically filled in the rotation angle with the angle of the ruler line. Click OK
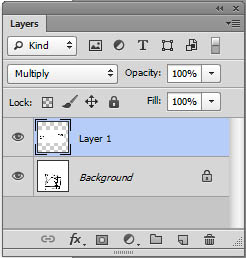
9. If a second layer is to be added to the drawing (hand written notes, other textures for instance) scan and adjust the sketches in the same manner and then copy the file and paste into the base layer. Use the MULTIPLY layer mode for the new layer to eliminate all the white from the second scan.