
Something to brighten up a dreary day.
1. Turn the grid on (VIEW menu > GRID), and snap to grid (VIEW menu > SNAP TO GRID.) Zoom in, we will be working within a 2″ x 2″ grid for this one.
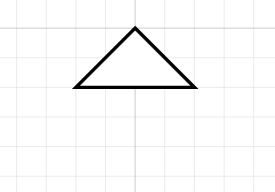
2. Make a triangle. At the top and middle of the 2×2 grid with the Pen Tool make a point, move to the right 2 small grid square and 2 down and make another point, move left 4 small grid square and click a point, finally click back on the original point.
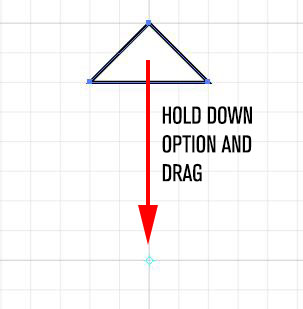
3. Select the triangle with the Black Arrow, then select the Rotate Tool. Hold the Option Key down and drag the Reference Point to the center of the 2×2 grid.
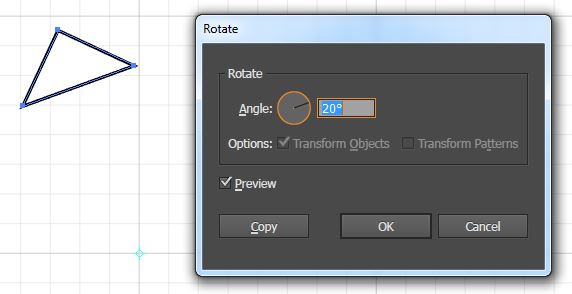
4. Release the Option Key and Mouse button and type 20 for the amount of degrees and click Copy
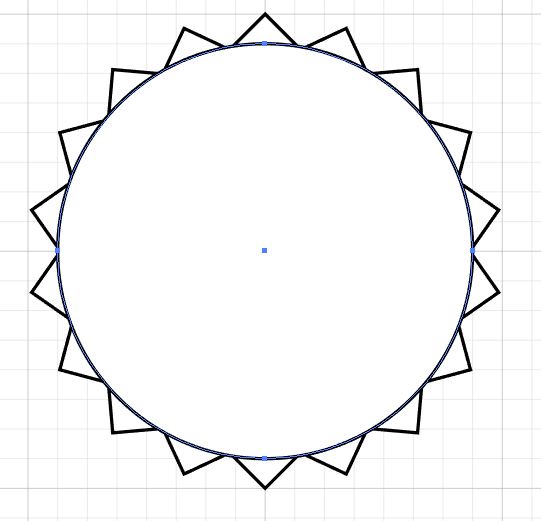
5. Repeat the transformation. Go to the OBJECT menu > TRANSFORM > AGAIN OR Type Cmd/Ctrl + D to repeat the transformation around the center of the grid. DO this until the triangle gets back to the top.

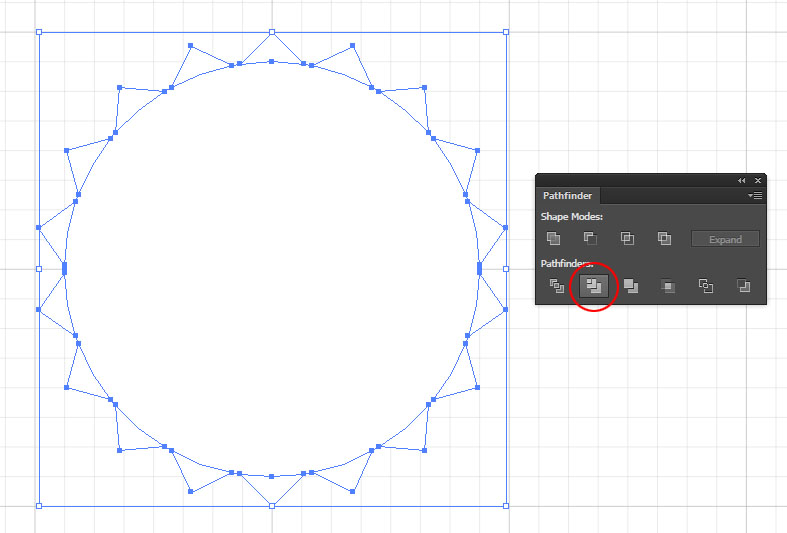
6. Select the Ellipse Tool, hold down the Option Key to draw the circle from the center and the Shift Key to make it a perfect circle. Draw the circle out to the next line in from the edge of the 2×2 grid.
7. Select all of the shapes with the Black Arrow and click the Trim option on the Pathfinder Panel (WINDOW menu > PATHFINDER) This will trim out all of the shapes underneath the circle and make the bottom of each triangle rounded. Using the Trim Pathfinder will also change the stroke color to White and Group everything together. After you have performed the Trim function type D on your keyboard to get back to the default colors (Black Stroke, White fill) and go to the OBJECT menu > UNGROUP.
8. Deselect everything by clicking on a blank area of the screen. Select the circle and double click the Scale Tool. Type in 95% in the Uniform box and click OK.

9. Select all of the shapes and change the fill and stroke colors.

Photoshop, Illustrator and InDesign Tutorials
