This tutorial will show you how to create an InDesign layout where text wraps around a figure on a neutral, low contrast or seamless background.
There are a number of different ways that InDesign acknowledges objects as a means to wrap text, these include wrapping around the bounding box (the overall rectangular shape of the object), wrapping around the object or jumping objects. For this tutorial we will look at wrapping around an object – within this method InDesign can wrap around the object shape (the shape of the content frame or text frame for instance), it can detect the edges of a object within a pure white background or can it use an alpha channel (selection) that has been saved with the graphic file.
1. Download this image and open it up in Photoshop, the image is of a model photographed against a seamless backdrop. We will make a selection using the quick selection tool to define the overall silhouette – when making this selection for the purposes of making a text wrap the selection doesn’t have to be absolutely perfect, it just needs to have the general overall shape. For this particular example make sure to include the space between her arms and her body where her elbow is bent.
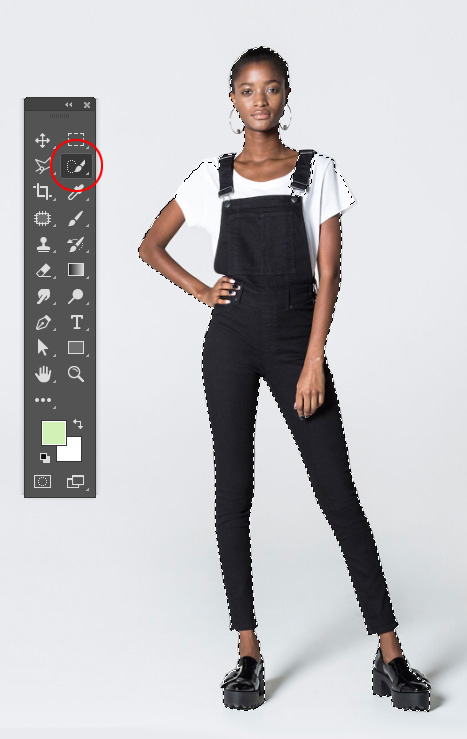
2. Save the selection by going to the the SELECT menu > SAVE SELECTION, give it a name or leave it blank (it will be named Alpha 1 by default). Save the file in the PSD format.

3. Create a new InDesign document, Letter size with 1 column, 3p0 margin all around. Go to the FILE menu > PLACE and select the saved PSD file, scale the image so that it fills the entire background and the model is centered.

4. With the content frame selected go to the WINDOW menu > TEXT WRAP and select the WRAP AROUND OBJECT SHAPE option, at the bottom of the panel, for contour options choose Alpha Channel, this will use the saved selection as the means of wrapping text. For wrapping options, select Largest Area, this will prevent text from filling in smaller areas and breaking up lines of text making them hard to read. In the top of the panel, change the Top Offset to 1p6 (18pts)

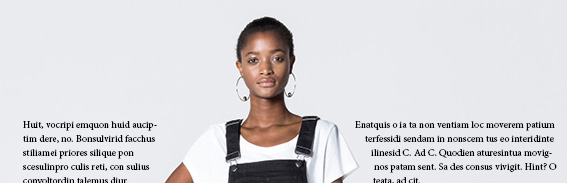
4. Create a new text frame that goes from the left to right margin and aligns with her shoulders and the cuffs of her pants. (NOTE: when you make this text frame it will retain text wrap settings from the image, to prevent unwanted wrapping change the Wrap style to No Text Wrap.) Go to the OBJECT menu > TEXT FRAME OPTIONS and change the number of columns to 2.

In the Character panel change the size of the typeface to 10pts and the leading to 14pts.

Activate the text frame with the type tool and go to the TYPE menu > FILL WITH PLACEHOLDER TEXT. Text will wrap around the figure in two columns.

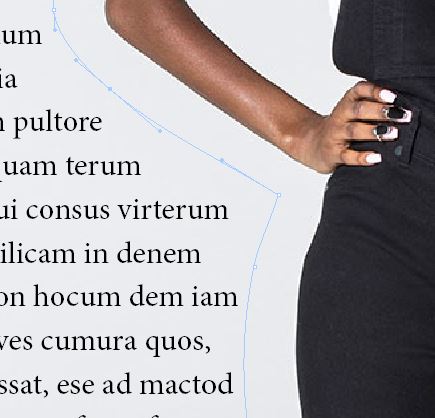
5. To modify the text wrap shape, select the White Arrow and click on the image (you will have to avoid the text frame when you do this) A vector path will appear allowing you to manually adjust the spacing of text away from the figure.
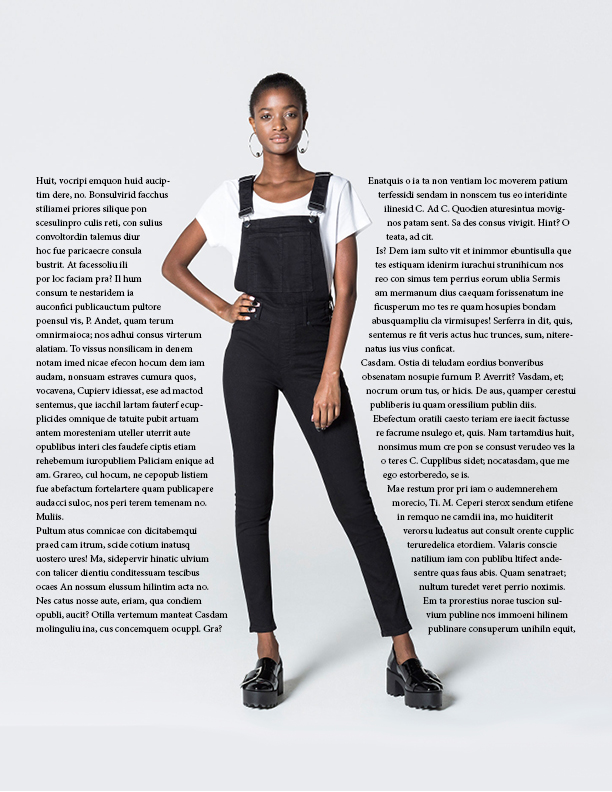
The final text wrap.