
Another super simple flower shape to make with Illustrator.
1. Draw a circle with the Ellipse Tool any size you wish, hold down the SHIFT key while doing this to make a perfect circle.
2. With the circle selected, add go to OBJECT menu > PATH submenu > Anchor Points for a total of 8 points.
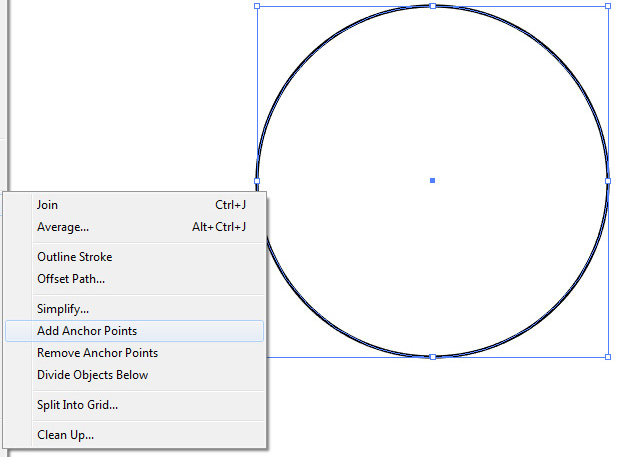
3. With the Direct Selection tool (white arrow) deselect the circle by clicking on a blank part of the screen. Select every other point of the circle with the White Arrow, hold the SHIFT key down to select multiple points [NOTE: the SHIFT key has two separate functions as illustrated in this tutorial – constraining a shape to equal proportions OR adding and subtracting from selections]

4. Double click the Rotate Transformation Tool in the Tool Bar. Type in 180°
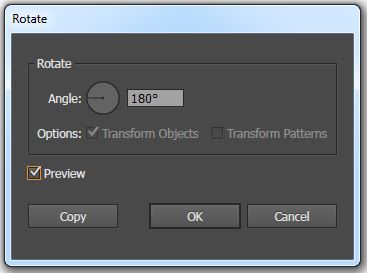
5. The Rotate Tool will rotate the four of the points around the center leaving the other four in their original locations leaving you with this geometric flower shape:

That’s It!
Photoshop, Illustrator and InDesign Tutorials
