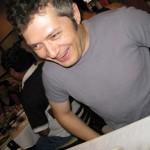
This is an ongoing quest to take an image in Photoshop (or After Effects for that matter) and make it look as if it’s drawn with brush and ink. The overall problem is that the machine doesn’t have a discerning eye and treats everything equally which means you either have to prepare your photos beforehand to create the optimal final product (which still requires experimenting on my part) OR combine the results from various attempts OR just live with what you have.
It took me a while to perfect this (and I’m still perfecting it) but the addition of the Hard Mix layer adjustment in CS3 (or 2, or CS, I’m not sure) made all the difference. Hard Mix allows you to create different threshold results by using different levels of gray, by blurring the top layer and messing with the levels (both input and output) of the top layer we can begin to get the brush and ink result. Doing a dust and scratches filter on the (flattened) end result can help clean up stray spots here and there.
Like I said, it’s not perfect but gets a very compelling result and can also be applied to footage in After Effects by basically doing the exact same steps.
Here goes:
1. open the image -convert it to grayscale, either by desaturating it, or in CS3 you can use IMAGE>ADJUSTMENTS>BLACK & WHITE – whatever works best.
2. duplicate the background layer ( i drag the background layer to the new layer icon in the layer palette)
3. temporarily turn off the new layer – invert the background layer IMAGE>ADJUSTMENTS>INVERT
4. add a gaussian blur to the background, something small like 4 to 8 pixels – in CS3 you can change the layer to a smart object LAYER menu > SMART OBJECT > CONVERT TO SMART OBJECT and then when you use the gaussian blur filter you can change it after you apply it (kind of how the filters work in After Effects or layer styles in Photoshop)
5. turn on the top layer and change the layer mode in the layer palette to HARD MIX
6. beginning playing with levels in each layer – change the black and white points as well as the gamma point – you might also change the output levels on the bottom of the levels dialog box and see what that does. You can also do these with adjustment layers as well to keep everything flexible.
7. You can further try to reduce the detail while maintaining the high contrast line work by going to the FILTER menus > NOISE > DUST & SCRATCHES


