
Here is a tutorial to make a banner in Illustrator. A banner is all well and good on its own , but a banner really should have a reason to exist, it should celebrate something or at least make something look important. We’ll make a banner that you can then use to embellish some of your favorite drawings or photographs. Here goes…
1. Make sure you are using the default colors (black stroke, white fill) by typing D on the keyboard.
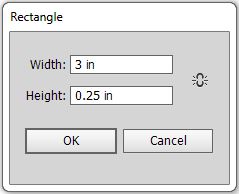
2. Click on the Rectangle Shape Tool and click on the screen to get the dialog box, type in 3in for the Width and 0.25in for the Height. Click OK.
3. Zoom in. Click on the screen again with the Rectangle Shape Tool and type 0.5in for the Width and 0.25in for the Height. Click OK.

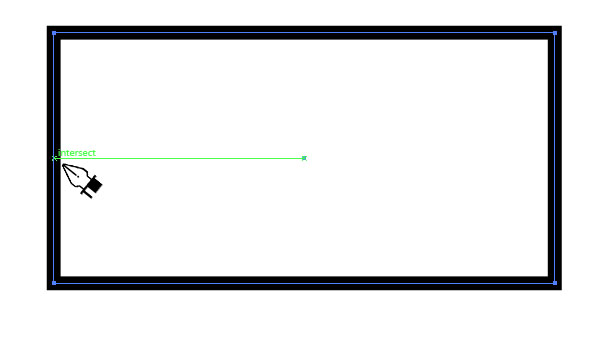
4. With the Pen Tool, click on the line segment of the left hand side of the small rectangle to Add an Anchor Point.
5. Highlight the new anchor point with White Arrow (the point should be highlighted in blue and everything else will be white) and use the Right Arrow Key on your keyboard to move it in 8 clicks.

6. Make a copy of the modified small rectangle by selecting it with the Black Arrow and then holding the Alt/Opt key down and dragging a copy (or you can CMD/CTRL + C and then CMD/CTRL + V)
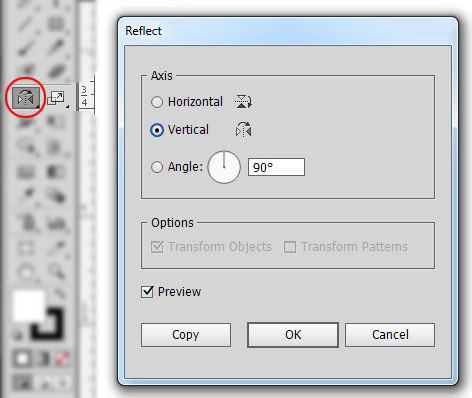
7 Make a reflected version of the copied small rectangle by selecting the rectangle and double clicking on the Reflect Tool. Choose Vertical for the reflection and click OK.
8. Move the pieces into position. Drag each small rectangle from the center to the bottom corner of the long rectangle (if VIEW menu > SMART GUIDES are turned on, it will snap to these inference points)

9. Move the long rectangle above the small rectangles by selecting it and going to OBJECT menu > ARRANGE > BRING TO FRONT.
10. Draw a line with the Pen Tool from the bottom right corner of the long rectangle to the bottom left corner of the small rectangle on the right. Do the same for the left hand side.

11. Put some type in the banner. Select the Type tool![]() . Change the Paragraph alignment to center
. Change the Paragraph alignment to center ![]() and change the point size to 14 with a typeface you prefer (try something fancy) Further type options can be found in the Character panel (WINDOW menu > TYPE > CHARACTER) try spacing out the type using a large Tracking number or make eeverything ALL CAPS (I will leave this up to your discretion) Click in the middle of the long rectangle and start typing. Use the arrow keys to move it into position.
and change the point size to 14 with a typeface you prefer (try something fancy) Further type options can be found in the Character panel (WINDOW menu > TYPE > CHARACTER) try spacing out the type using a large Tracking number or make eeverything ALL CAPS (I will leave this up to your discretion) Click in the middle of the long rectangle and start typing. Use the arrow keys to move it into position.

12. Select everything with the black arrow and go to the OBJECT menu > GROUP
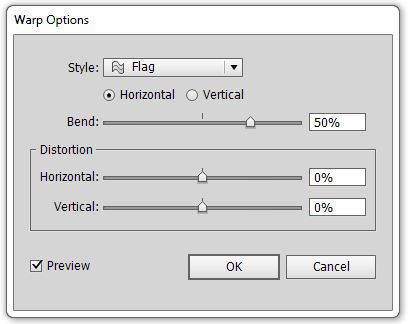
13. Select the group and go to the EFFECT menu > WARP > FLAG. Leave the default options selected or play around with your own, click on Preview to see what’s happening to your banner before you apply the effect.
14. Now, you can take this banner and place it on top of photos everwhere. You can even edit the type by highlighting it with the Type tool and highlighting the text, the text with stay warped!

Photoshop, Illustrator and InDesign Tutorials
