How about this for irony, here’s how to draw a pencil in illustrator.
1. Turn on the grid and snap to grid. Go to the VIEW menu > SHOW GRID and VIEW menu > SNAP TO GRID
2. Set your stroke color to Black and your fill color to None
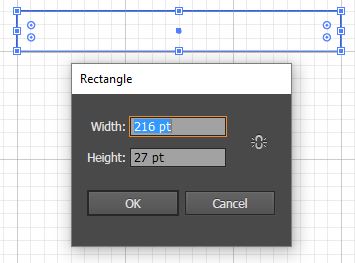
3. Draw a rectangle 3 inches wide, by 3/8″ high you can also click the rectangle tool on the screen and type in 216 pt wide by 27 pt high
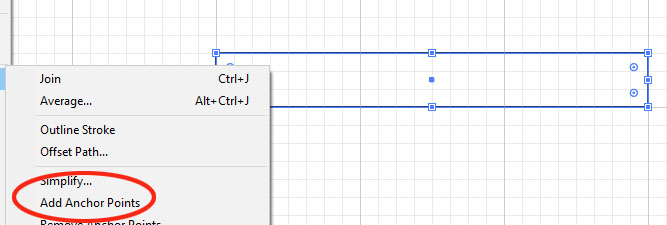
4. With the rectangle selected go to OBJECT menu > PATH > ADD ANCHOR POINTS
5. With the rectangle still selected take the delete anchor point tool (type -) and delete the points on the top right and bottom right

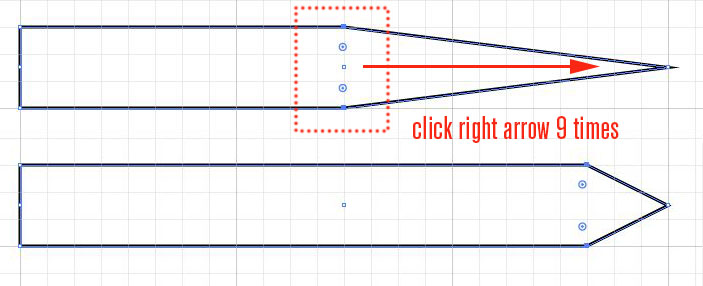
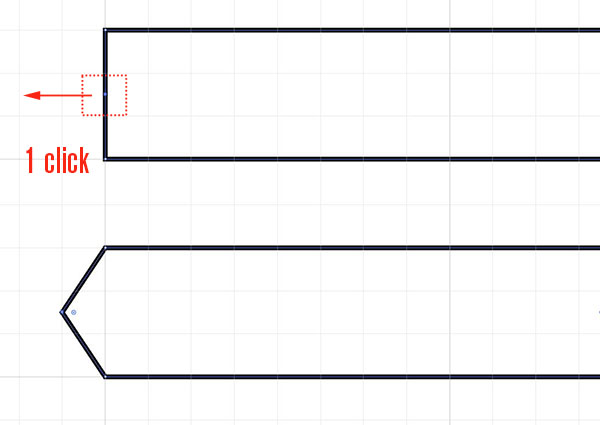
6. Select the two middle points (upper and lower) with the white arrow and hit the right arrow key 9 times
7. Select the middle point on the left hand side with the white arrow and hit the left arrow key once
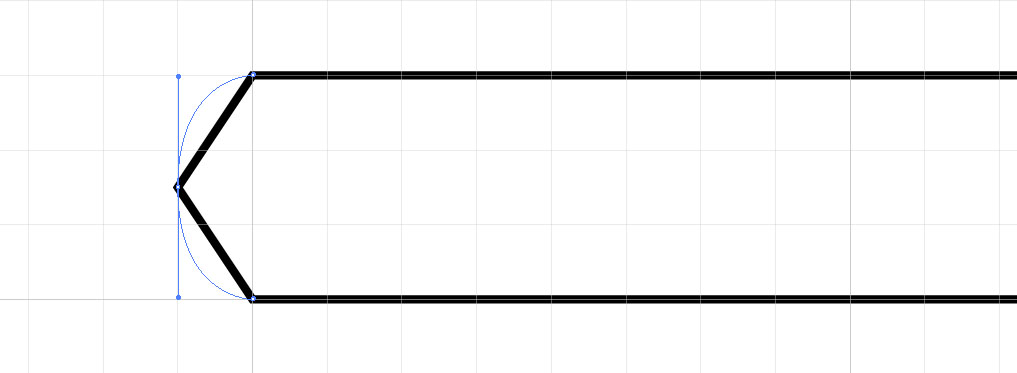
8 Choose the anchor point tool (associated with the pen tool or SHIFT + C), click on the point you just moved to convert it to a curve and drag the handle up until it meets the same level as the top of the rectangle, hold the shift key down while doing this.
9. With the white arrow select both parts of the new curve and copy it (cmd/ctrl + c)
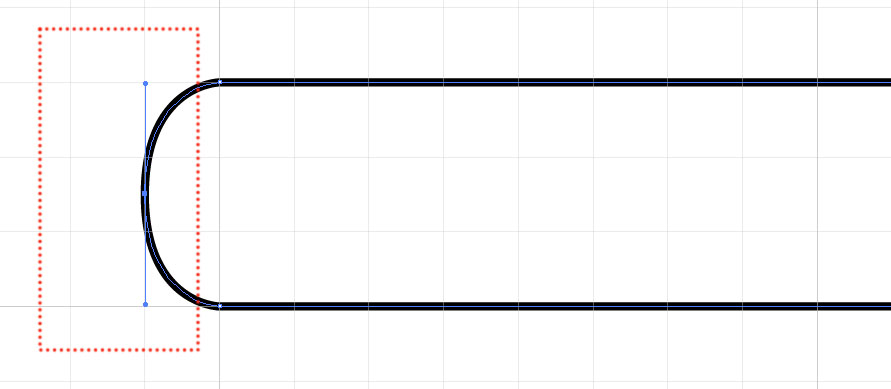
10. Go to the EDIT menu > PASTE IN FRONT (cmd/ctrl + f) to paste it in the exact location. use the right arrow key to move it 3 clicks
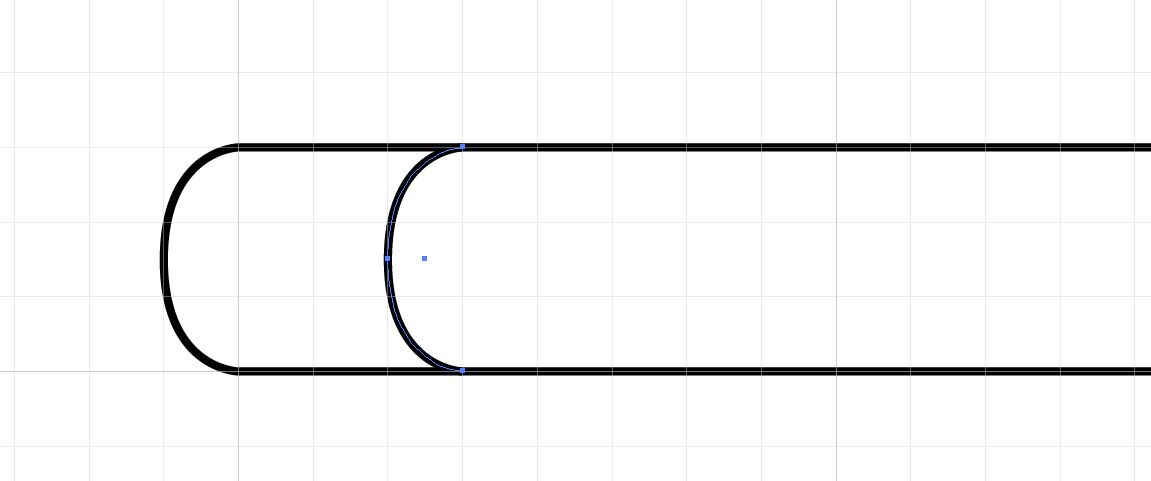
11. Repeat the above steps but this time move the copy only one click with the right arrow
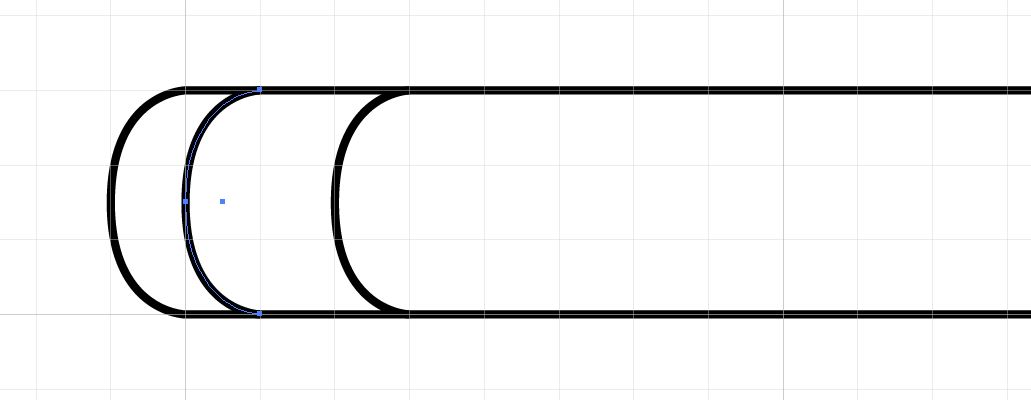
12. Go to the EDIT menu > PASTE (cmd/ctrl + v) to paste in a copy of the curve, use your arrow keys to move it so that the curve aligns with the point on the right hand side.
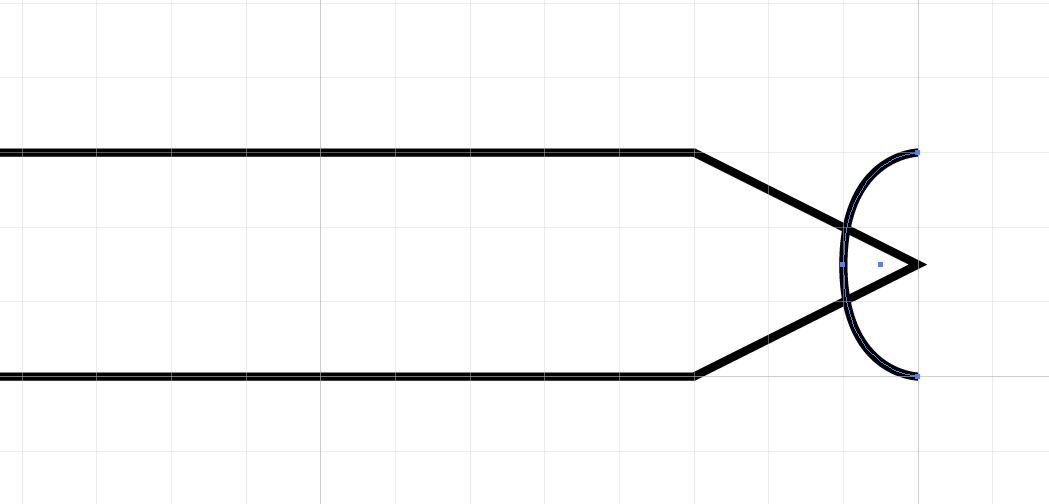
13. Select the Ellipse tool and draw a 3 circles stacked one above the other at the right hand side where the point begins
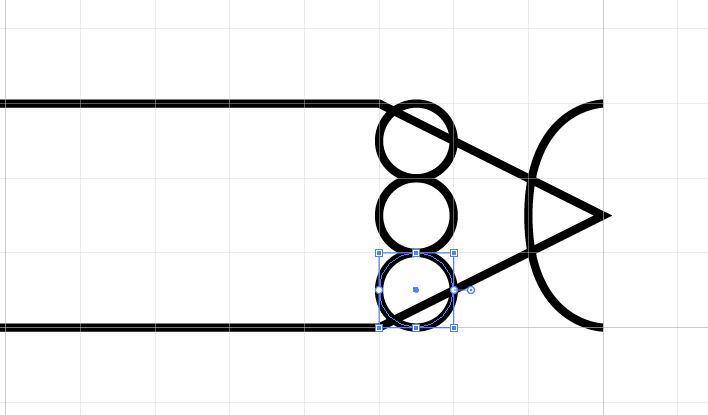
14. Select the three circles and double click the black arrow put -4.5pt for Horizontal and 0 pt for vertical. Click OK

15. With the line tool, draw 2 lines parallel to the rectangle starting at the intersection of the circle and going to the “eraser”

16. Open the Pathfinder panel WINDOW menu > PATHFINDER and then select everything and click the divide icon.
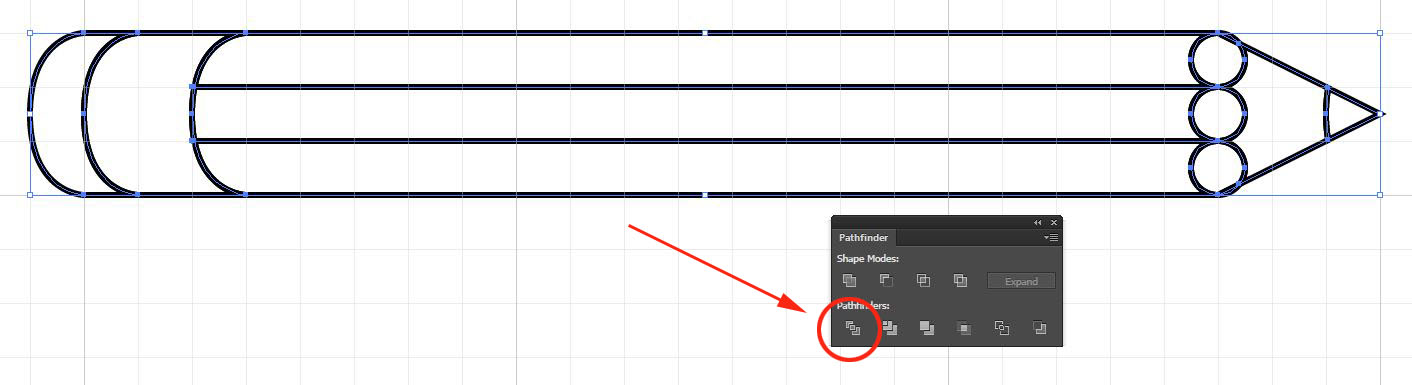
17. Type D on the keyboard to make everything the default colors and then go the OBJECT menu > UNGROUP
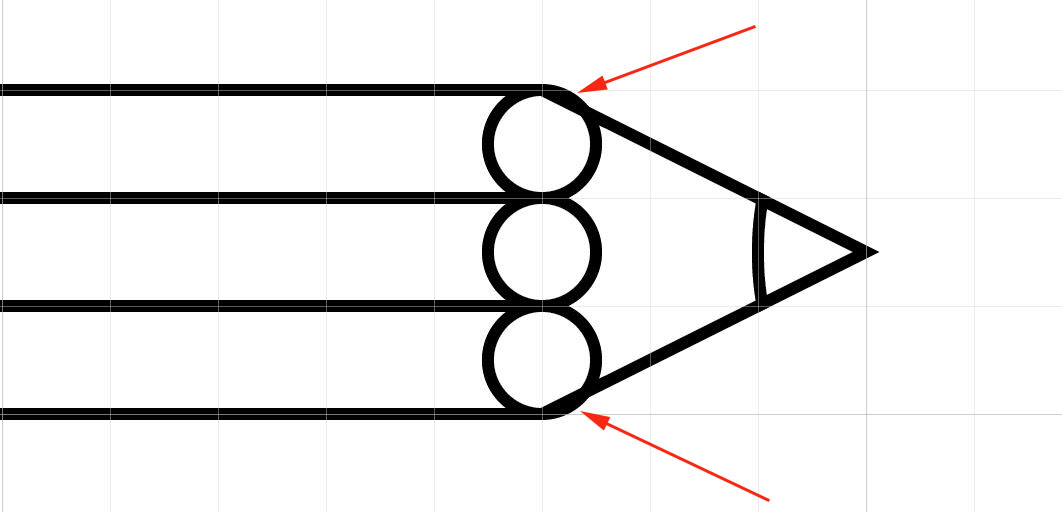
18. Zoom into the point of the pencil, select the parts of the upper and lower circle that extend beyond the point and delete them
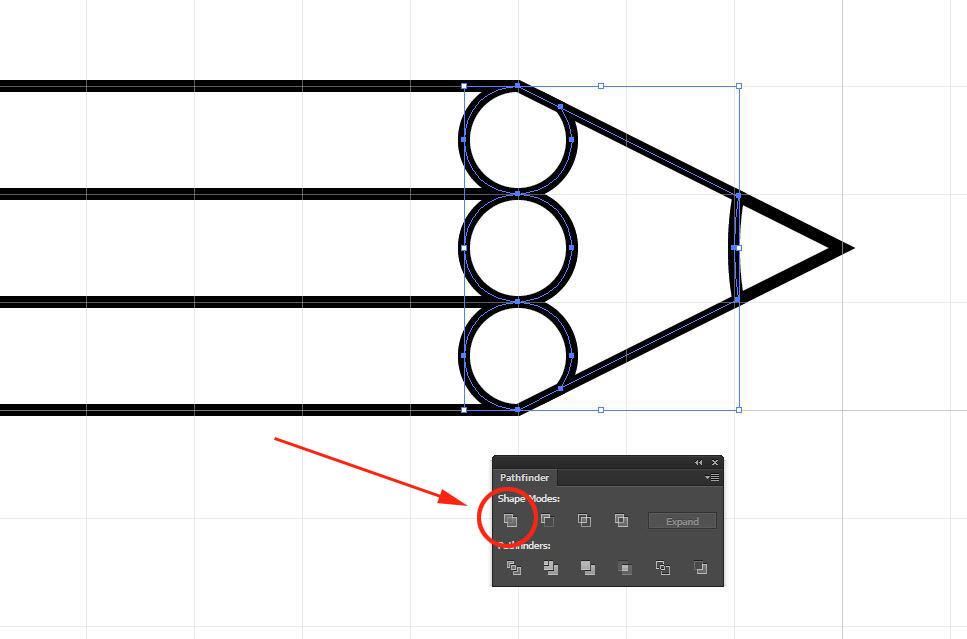
19. Select the three circles and the shape to their right (hold down the shift key to add or subtract from your selection) and click on the UNITE icon in the pathfinder panel to merge all the shapes.
20. Change the fill color of the eraser to pink, the metal part to gray the body of the pencil to yellow, the wood part to light brown and the point to black.

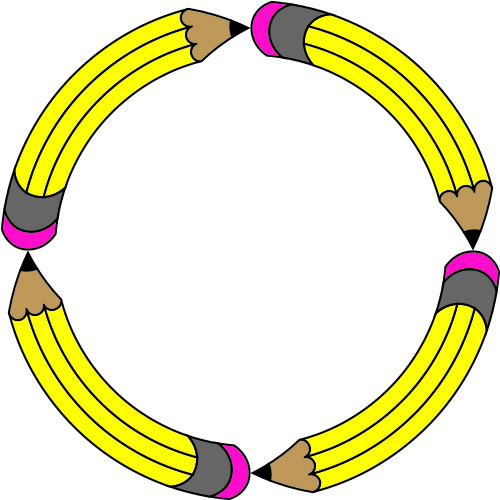
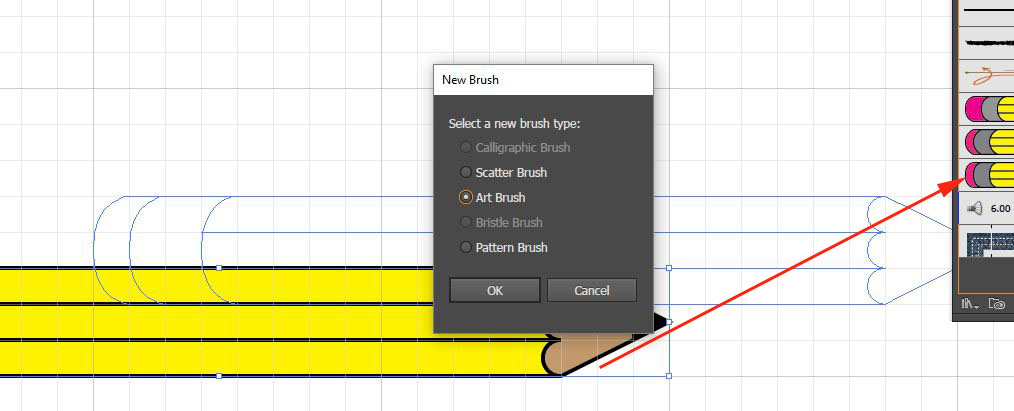
21. If you’ve made it this far and are feeling adventurous drag the pencil to the BRUSHES panel and make an art brush out of it.
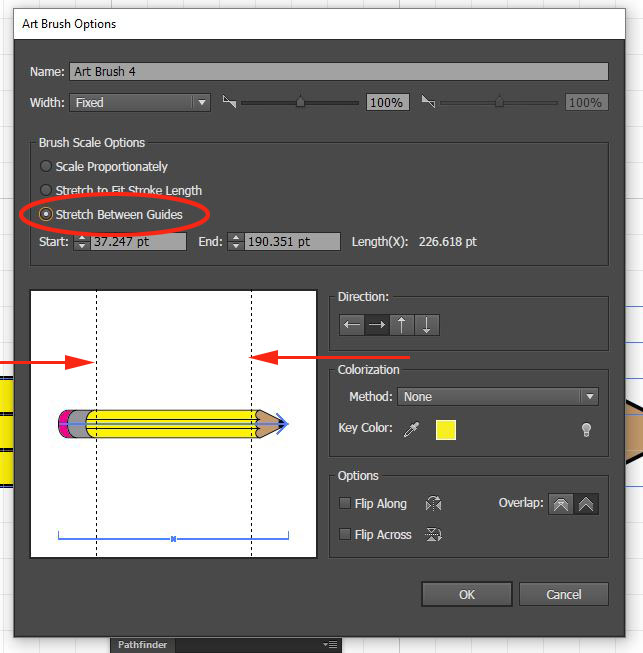
22. Change the brush scaling option to Stretch Between Guides and align the guides with just the pencil body (yellow part) of the pencil so that only that part will stretch.
23. Click OK, draw a few lines or curves and apply your new pencil brush to it.