
A student of mine wanted to create text that had an old school analog halftone look. While the Photoshop Halftone filter does an adequate job, it is fairly limited and doesn’t allow for a full range of experimentation and exploration.
This tutorial will take a look at the Bitmap image mode to achieve the desired result and will also show some fun variations with the tool.
First off, Bitmap refers to a method of creating images that are composed of pixels that are Black or White, in reality the the pixel is either On (Black) or Off (White) it’s also sometimes referred to as a 1-Bit image.
Let’s start off making the text that we have at the top of this post.
1. Make a new file in Photoshop (I used the default photoshop size, but you can of course use any size you like)
2. Type in your desired text and make it large enough to stretch across the canvas (I used Futura Extra Bold)
3. Flatten your image. LAYER menu > FLATTEN IMAGE, or apple/control + E
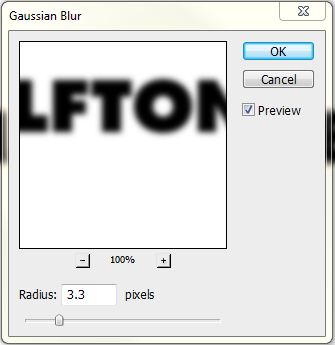
4. Apply the Gaussian Blur Filter to the text. FILTER menu > BLUR > GAUSSIAN BLUR. For this I used a setting of 3.3 to achieve a significant, but not over the top soft edge – you can certainly vary this based on your own needs and preferences.
5. Convert the image to Grayscale. IMAGE menu > MODE > GRAYSCALE (you have to do this intermediary step as you can only convert to Bitmap from Grayscale) Photoshop may ask you if you really want to discard the color information. Yes, you really want to discard the color.
Let’s stop here to take a look at the Bitmap conversion mode.
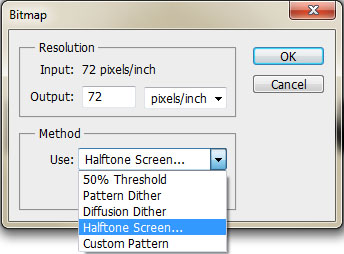
There are 5 different methods for converting to Bitmap. 50% Threshold means the image is converted into areas of black and white and delineates black vs white by making the threshold point exactly in the middle of the histogram map (The IMAGE menu > ADJUSTMENTS > THRESHOLD command allows you to modify this breaking point)
Pattern Dither uses a uniform pattern to represent levels of gray.
Diffusion Dither uses a random pattern to represent levels of gray.
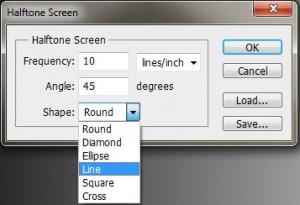
Halftone Screen uses preset patterns (round, diamond, ellipse, line, square or cross) at frequencies and angles that can be varied as well.
Custom Pattern allows you to use any of your pattern presets (or one that you create) to be the basis for the bitmap conversion.
6. Let the fun begin. Convert the image to Bitmap. IMAGE menu > MODE>BITMAP and use the Halftone Pattern option. For our example, we’ll use the round shape (to achieve the old school dot pattern) with a frequency of 20 lines per inch (which will make the dots an average size) and the angle set to 45. This is a great opportunity to experiment with different settings, especially the frequency (smaller numbers will make the patterns larger) and the shape. The only drawback to this is that there is no preview option which means you will have to apply the conversion and if you don’t like it – undo it and try something again.
7. Now, let’s get it back it into the world of color. Go to the IMAGE menu > MODE > GRAYSCALE, then IMAGE menu > MODE > RGB.
8. Crop your image close to the text.
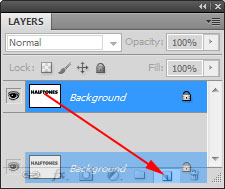
9. To apply the color gradient as in the example (or a color overlay) make a copy of the background layer by dragging the layer to the new layer icon on the layer palette.
10. For the background copy layer, click the FX icon at the bottom of Layer Palette and select gradient overlay. Choose a gradient you like (or make a new one), set the blending mode to Screen (this will allow the gradient to affect only the black and leave the white alone) and continue to play around with all the other gradient controls. If you use only the color overlay, make sure the blending mode is set to Screen as well.
Some variations
I like to use the line halftone for photographs, especially a lower frequency line count. The thick and thin variations of the line that defines different shades of gray is really cool.

For this image I used a frequency of 8 lines per inch with the lines set to 90 degrees (and with a red color overlay)
A fun variation is to make a pattern from the image you are using and then convert to Bitmap using custom pattern.
1. Open up an image you want to play with (a portrait or close up works well)
2. Duplicate the image. IMAGE menu > DUPLICATE.
3. In the new copy, change the image size so that the image is tiny (around 40 pixels wide or so – you’ll have to play with it to make it work for your purposes) IMAGE menu > IMAGE SIZE > change pixel dimension width to your desired size, make sure resample image is checked.
4. Select all. SELECT menu > ALL or Apple/Control + A then EDIT menu > DEFINE PATTERN, this will take the condensed version of the image and make it a pattern.
5. Go back to the original and convert it to grayscale and then convert it to Bitmap. Use Custom Pattern as the method and select your new pattern. Now your image has been converted to Black and White using itself as the pattern.
6. Convert back to grayscale and then to RGB.
7. Print it out to show your friends how awesome you are!
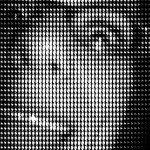
click the image above for a full size version
This is only the tip of the iceberg and there are truly endless possibilities with this. ENJOY!

3 responses to “Photoshop Tutorial – Halftones…and beyond”